Smos has been the centerpiece of my self-management for years now, but most of my clients have not been software engineers. Smos still fits a software development workflow very well, so I figured I would describe an example workflow here.
Jumping into a codebase to make some fixes can be more stressful than necessary. You find things that could be refactored, you might find bugs, missing tests, or even problems with dependencies. Somehow a simple issue suddenly becomes a monumental and complex task that you can't even get a good overview of.
You can use Smos to help yourself turn this unclear mess into small incremental units and then bang them out as you go. This way you don't need to feel overwhelmed and get a dopamine hit every time a piece of the yak is shaved.
Quick intro to Self Management and Smos
Smos is a comprehensive self-management system. At the core is the smos TUI, but additional command-line tools like smos-github can be used to enhance the automation of your self-management system.
If you already use Smos for self-management, this blog post should help with how to use it for software development. If you already have a self-management system, but are new to Smos, this blog post can give you an idea of how Smos could work for you. If you are new to both self-management and Smos, this blog post can hopefully give you an idea of how much less stressful your work could be.
Requirements
It's important to understand what you can achieve with a good workflow tool.
Ideally the entire process involves no stress whatsoever. It could feel like a walk in the park with the occasional loot pickups that provide a dopamine hit.
Whenever you bump into extra tasks, you want to not get distracted by them but still complete them eventually. Any extra tasks you uncover should not discourage you, or make you feel uneasy about getting your original task done.
Because life can happen at any time, it is also important that you can step away from the task at any point without being discouraged or losing progress.
Example process
As a running example, we will use a situation that you may be familiar with: Someone opens an issue for a bug on a somewhat old open-source project that you've made. Since the last time you have touched this project, you have learnt a lot. Nowadays you would do things very differently, so you see a lot of things to improve.
I will use an issue for the Smos project itself as an example.
Some necessary background information:
Any
.smosfiles can be synchronised with a central server using thesmos-sync-clienttool.Those Smos files are then synchronised with the
smos-serverin a merge-conflict-free manner.The
smos-web-serverproject, which hosts Smos Online, can also synchronise with thesmos-serverto show an in-browser editor.The
smos-sync-clienttool automatically removes empty directories by default.
The reported bug is that empty directories still show up in the online editor.
Import the issue
GitHub issues are not central to the self-management system that I recommend. There are a few reasons for this:
Anyone can add things there, which means you can get overwhelmed quickly if you auto-accept commitments that way.
Viewing issues requires an internet connection
Getting an overview of your entire system becomes impossible if it is fragmented across many tools.
Instead we can import any GitHub issue as a Smos project file using the import command of the smos-github tool:
$ smos-github import https://github.com/NorfairKing/smos/issues/253
Importing to /home/syd/workflow/projects/smos/issue-253.smos
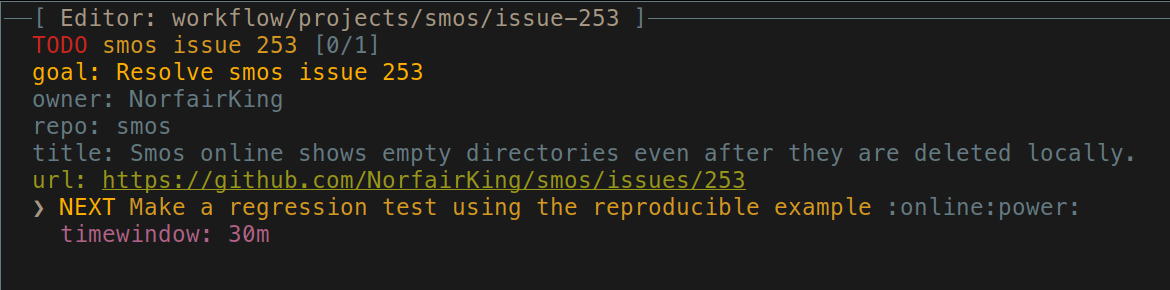
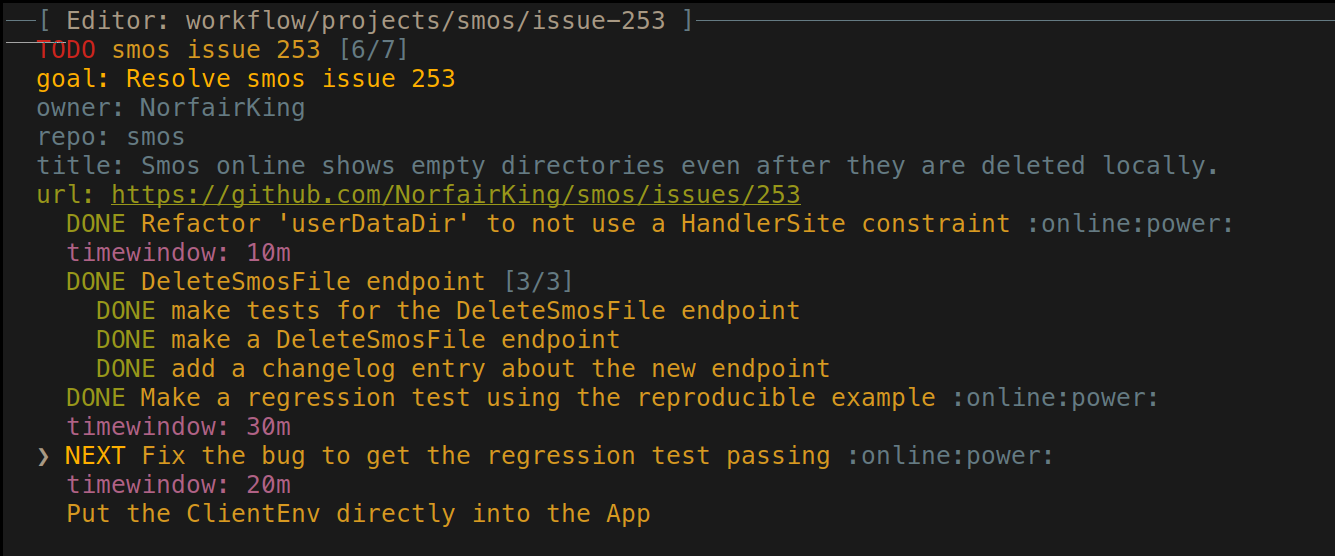
This gets you a nice project file:

Processing the stuff
However, if we now run our work report (rr), we get a warning like this:

Indeed, we still need to process this input. For processing, we use this flowchart:

In this case the "stuff" is indeed actionable. What needs to happen is to fix the bug, and the next action to do so is to create a regression test.
Getting started
Now that the project is processed, we can walk away from it and work on it once it shows up in our work report (rr):

So let's say that just happened. We have a time window that is at least 30 minutes, and we have an internet connection as well as a computer that can compile code. We want to start work on this project.
Feedback loop
Before we can start any work, we need a feedback loop. This is a loop that reruns a process on every change automatically such that we know that we are done when the loop turns green.
The feedback loop starts green, because the work was "done" the last time we worked on the project. We then turn the feedback loop red in such a way that we know that we are done when it turns green again. In this case we can do that using a failing regression test. Once the regression test passes, we are done.
You can build general feedback loops using the feedback tool. You can also build a language-specific feedback loop using a watch command in your language's build tool for example. Some projects might have feedback loops documented in developer documentation. Indeed, the Smos documentation has information about which feedback loop we can use here.
In this case we start with a stack test smos-web-server --file-watch feedback loop. Once we start writing our regression test, we refine it so that only that one test is run:
stack test smos-web-server --test-arguments='empty'
First Yak
As I started implementing the regression test, I noticed that I was writing this:
      burl <- asks $ appAPIBaseUrl . yesodClientSite
      man <- asks $ appHttpManager . yesodClientSite
      let clientEnv = mkClientEnv man burl
I then searched the project for other occurrences of mkClientEnv and realised I could DRY this up.
This post is not about Haskell, so you really don't need to understand what that means or why one might want to refactor it. Assuming we do want to refactor it, we now don't do that directly.
Instead, we put it in the project file as a note:
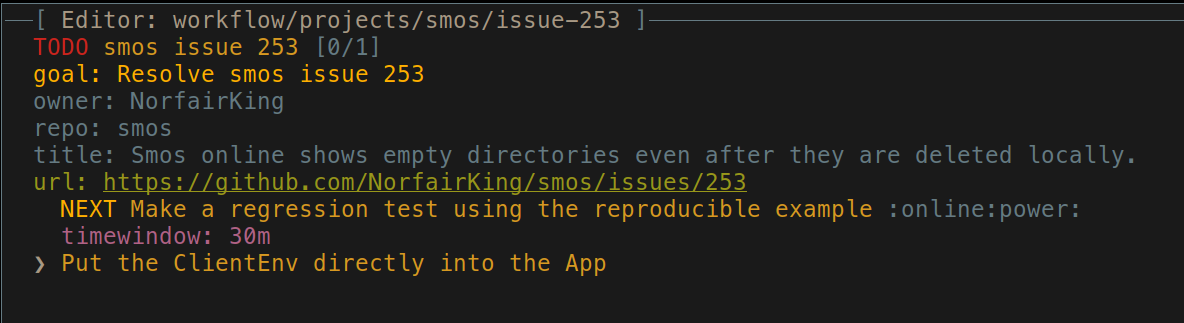
Note that we don't mark it as TODO because we haven't committed to doing it yet. It might turn out that we would prefer not to do this at all for reasons that are unknown so far, and we don't want to get distracted investigating that. Now that we've made this note, we continue with our current task, trusting that we'll get back to this afterwards.
At this point I'd forgotten the context the task already, so I wanted to visit the issue in my browser again. You can use <space>ou on the title entry to open the issue url in our browser.
Break
At this point in the process, I needed a break. Mostly because I'm writing this blog post as I go along, but also to make a point:
This process is designed such that you can take a break at any point without losing context or forgetting things.
Necessary refactor
The next yak involved checking whether the directory that we are expecting to delete exists before we delete it. The web server stores these directories somewhere, and that is computed using this function:
userDataDir :: (MonadHandler m, HandlerSite m ~ App) => Username -> m (Path Abs Dir)
userDataDir un = do
  dataDir <- getsYesod appDataDir
  usersDataDir <- resolveDir dataDir "users"
  resolveDir usersDataDir $ usernameToPath un
Again, you don't need to know what that means, necessarily. All that matters is that we cannot use this function in the test as-is. A little refactor is necessary before we can continue writing the test.
In order to maintain the "break" property described above, we must not just go ahead and do that while keeping the context in mind. Indeed, if we were to be distracted (by a crying baby, for example,) then we would have to go and rediscover that we need to refactor userDataDir next time. Another reason to use the following, more rigorous process, is that we might discover more yaks to shave during the refactor. In that case we might need an unbounded amount of working memory capacity to do the work in full.
Instead, we write down the refactor ahead of the previous task as follows:
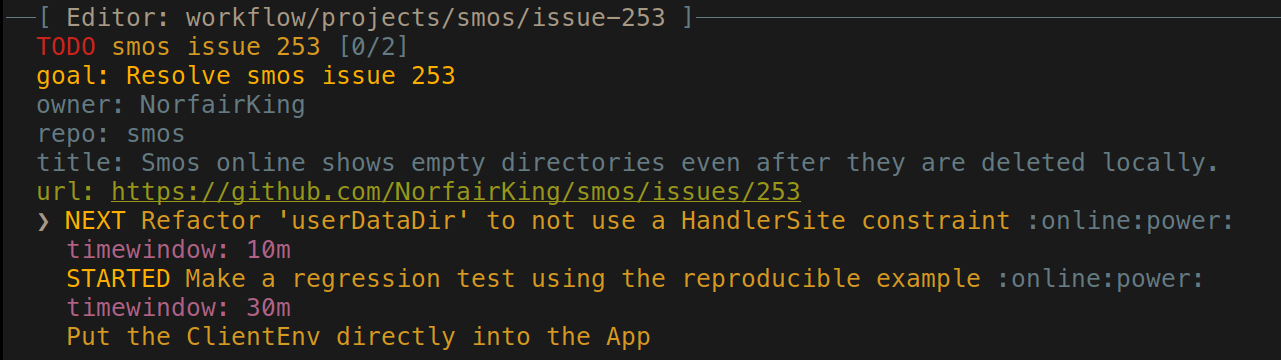
With this little refactor done, I can now use resolveUserDataDir in tests:
userDataDir :: (MonadHandler m, HandlerSite m ~ App) => Username -> m (Path Abs Dir)
userDataDir un = do
  dataDir <- getsYesod appDataDir
  liftIO $ resolveUserDataDir dataDir un

resolveUserDataDir :: Path Abs Dir -> Username -> IO (Path Abs Dir)
resolveUserDataDir dataDir un = do
  usersDataDir <- resolveDir dataDir "users"
  resolveDir usersDataDir $ usernameToPath un
While continuing to write the regression test, I noticed that there was a missing endpoint and wrote that too. I finished the regression test and finally got a red feedback loop
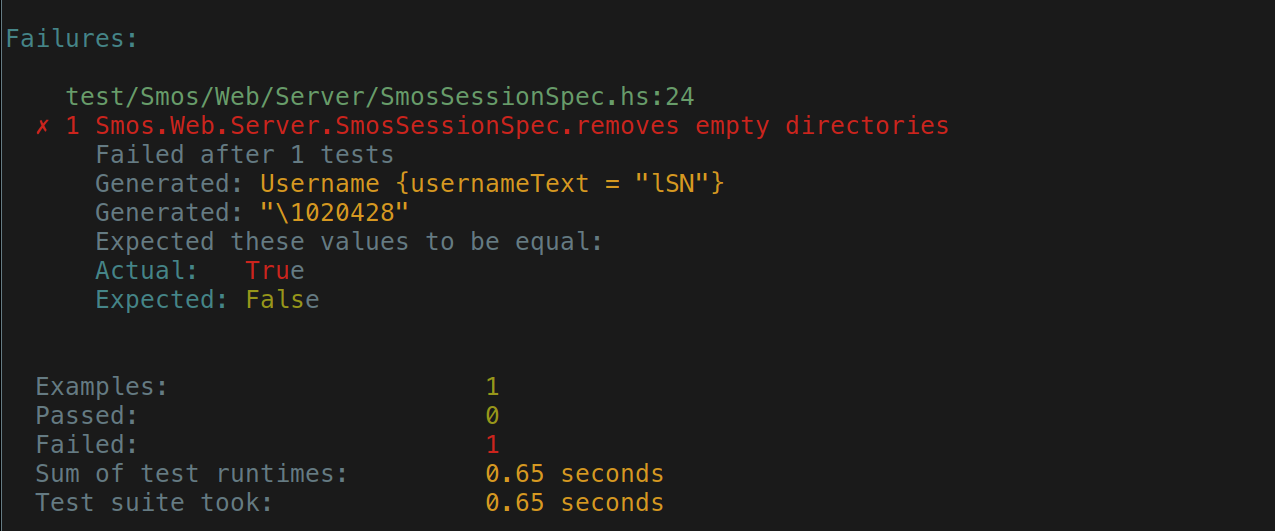
At this point the project file looks like this:
Fixing the bug
The actual fix was only a single-line change:
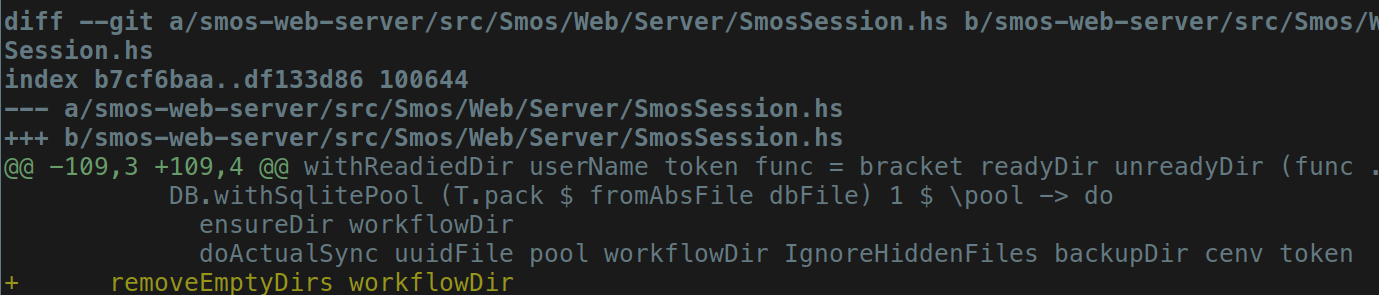
After this change, the feedback loop turned green:
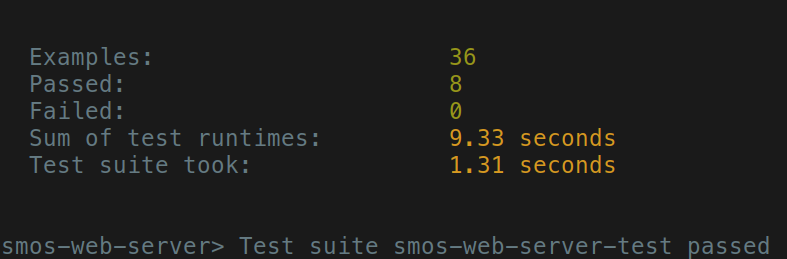
Now we run all tests locally, make a PR, and wait for CI to pass.

(Note that the command succeeds. The warnings are not relevant at this point.)
Getting back to the scratchpad
At this point your project will look mostly completed and have some notes at the end:
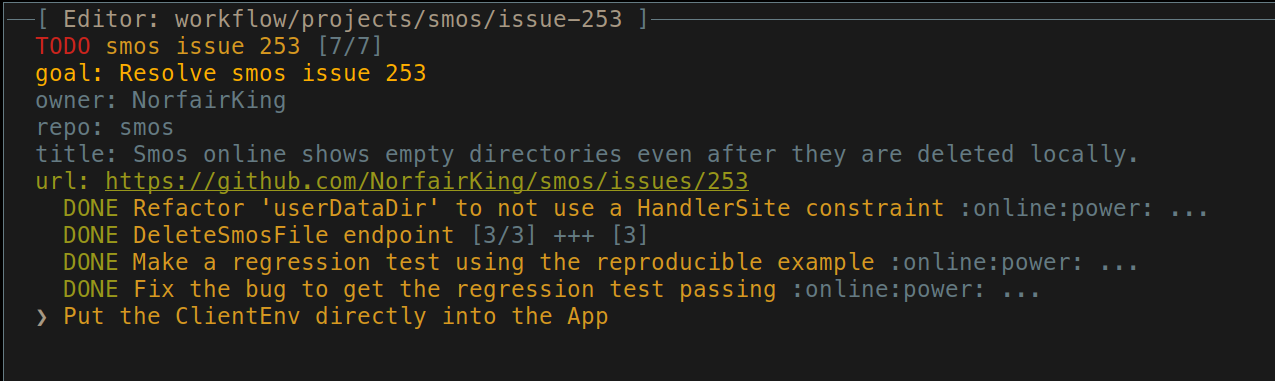
This is when you process the remaining items as if you found them in your Intray. (I.e. with the flowchart above) You can either do them immediately, turn them into separate own projects, or turn them into issues is your tracker.
In this case I will mark the item as NEXT and make a separate commit with this refactor.
Conclusion
This process is designed to:
... minimise stress.
... minimise the required amount of working memory capacity on the part of the programmer.
... allow you to step away from the task at any point.
... specify exactly how you can tell that a task is done.
... take advantage of little hits of dopamine you get from completing sub-tasks.
If you found this blog post interesting, and are keen to learn more, be sure to have a look at my self-management course!
Appendix: Process summary
Take on a task; If it's a GitHub issue, you can use
smos-github importto turn it into a smos project.Open dev-shell; Ideally this is as simple as
nix developand happens automatically with something likedirenvorlorri.Start feedback loop; Ideally this is as simple as
feedback <loopname>.Dive in, turn your feedback loop red.
Make your changes to try to turn your feedback loop green again.
If you notice refactoring-opportunities, take note of them.
If you notice bugs, take note of them.
If you notice missing tests, take note of them.
If you notice problems with a dependency, take note of them.
Feedback loop turns green; Finish up your change
Process your notes and repeat the cycle as necessary.