This post announces feedback, a tool to help you and your team set up and maintain feedback loops. The feedback tool is available on GitHub and on Hackage.
I have written about feedback loops before, and in fact referring to that blogpost is what gave me the idea for this tool. The feedback tool is a manifestation of my strong opinion that one should start any programming task by setting up a feedback loop; Something that tells you when you are done. A great example would be to build yourself a light that is red when you start, such that you know you are done when the light turns green. In the ideal case, this light should also be extremely debuggable, so that you know exactly why the light isn't green at any point.
Step 0: Trying the examples locally
If you wish to follow along with the examples in this blogpost, then you can use the nix flake that is provided to try them out:
nix run github:NorfairKing/feedbackStep 1: Automated Ad-hoc feedback loops
The simplest use of the feedback tool consists of automating the "up arrow, enter, wait" feedback loop that we tend to make using a given command that we retry.
Instead of switching windows, pressing "up arrow", seeing make appear, and "pressing enter", we can now use:
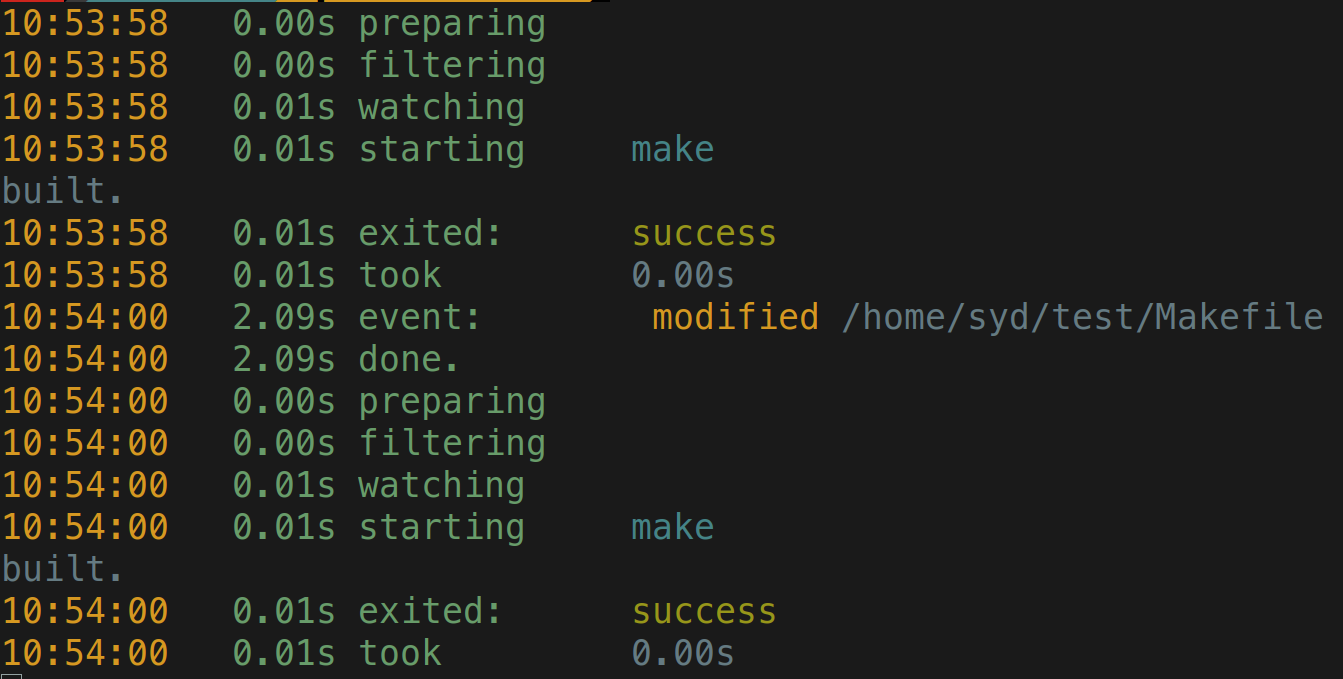
feedback makeThe feedback tool will automatically figure out which files and directories are relevant, and will rerun make whenever any of them change. It will also show you very debug-able output about what is happening and clear the screen whenever it restarts the loop:

You can even use --no-clear to precisely each stage the tool went through, and to see which file was changed to cause the rerun.
feedback --no-clear make
Note that the verbosity of the output was implemented with clear purpose. When you see starting, you know that the tool is not stuck before that. When you don't see exited, you know that the command is still running. This lets you immediately falsify some common problems during debugging.
Step 2: Configured feedback loops
Too many of my projects have contained a little scripts directory that would have a nice development-only one-shot environment setup. These scripts were often undocumented and hard to find unless explicitly described in the project README.
With the feedback tool, you can configure feedback loops in a feedback.yaml file. For example, the make loop above could be described as follows:
loops:
  make:
    description: Work on the "all" target
    command: make
Note that this lets you annotate your feedback loop with a description of when you might use it. This description is optional, but integrates nicely with how you can run feedback without arguments to see the available loops.
feedback # No arguments
Such a configuration lets you share your feedback loops with team members, by committing them in a feedback.yaml file. There is also shell integration (and autocompletion!) so that whenever your team members run nix develop in your repository, they see this output without having to read any README.
For an idea of how configurable these loops are, here is the feedback loop I used to write this blog post:
loops:
  devel:
    description: Work on site content
    script: |
      set -x
      hpack
      cabal build site:lib:site site:exe:site
      killall site >/dev/null 2>&1 || true
      cabal exec -- site serve & disown
    env:
      DEVELOPMENT: 'True'
      DRAFTS: 'True'
    working-dir: site
    filter:
      find: "-type f -not -name '*.md'"
Step 3: Considerate CI
The last piece of the puzzle concerns team members with differing workflows. All too often will an update break some other team member's workflow. With the feedback-test tool, you can test that all configured feedback loops still work as intended.
Indeed, feedback-test will run every configured loop once, without watching anything, in exactly the way feedback would. This way, if you make feedback-test part of your CI, you can ensure that no one breaks anyone else's workflow.
References
References: