This is the first post about using Smos for self-management in practice. It explains how to get started with Smos by learning to use the next-action report.
Overview
Smos is an editor for Smos files. (Smos files are just Yaml, see pieces of a smos file) Smos files are where you store the results of clarifying what you want to do with whatever lands in your Intray/Inbox/email inbox. The smos-query tool then lets your run reports on these files.
Getting Smos
The reference documentation for Smos is hosted on the documentation site. In particular, see the installation instruction page to get Smos. The rest of this post assumes you can run the smos and smos-query binaries.
Basic editing in Smos
The editor is optimised for speed, so the mouse is rarely used. To get started editing Smos files, you will need to know only a few keybindings.
Start editing a file foo.smos using smos foo.smos.
You should see something like this:
Next, run the selectHelp action using ? or M-?. You should then see the help page for the empty file context:
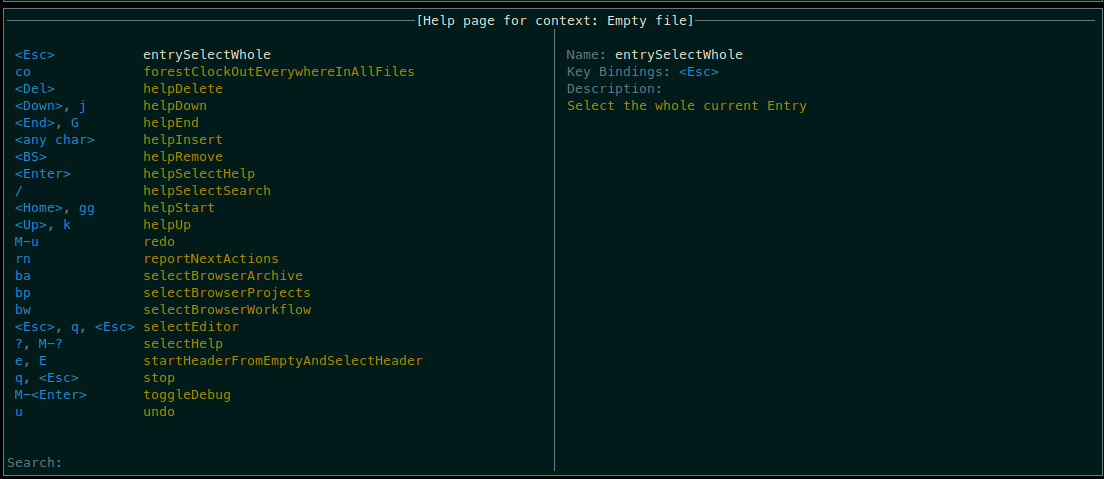
Note that help pages have a context. You will get a different help page depending on which context you are in. This will become clearer when you run M-? in the entry context in a moment.
In the help screen you see the startEntryFromEmptyAndSelectHeader action described. You can scroll to it using the helpUp and helpDown actions which you can activated using <Up> and <Down> or k and j. To exit the help page, activate selectEditor using <Esc>. To start adding entries to a file, run the startEntryFromEmptyAndSelectHeader action using e or E.
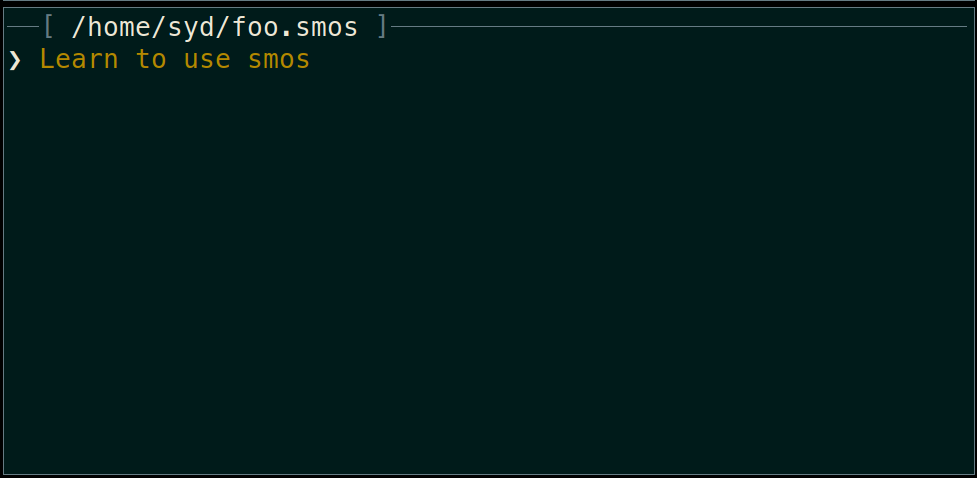
Now you are editing an entry and have the header selected. You can type a title and activate the entrySelectWhole action using <Esc> to finish it. Try titling this file Learn to use smos. Your screen should look like this:
From here on you should look into the help page again to learn the keybindings.
You can create new entries using the forestInsertEntryAfterAndSelectHeader (e) and forestInsertEntryBelowAndSelectHeader (E) actions.
You can move around in a Smos file using these actions:
forestMoveUp(k)forestMoveDown(j)forestMoveLeft(h)forestMoveRight(l)
You can delete entries using forestDeleteCurrentEntry (d) and undo actions using undo (u). All of the default bindings should be relatively self-explanatory.
See if you can get your file to look like this:
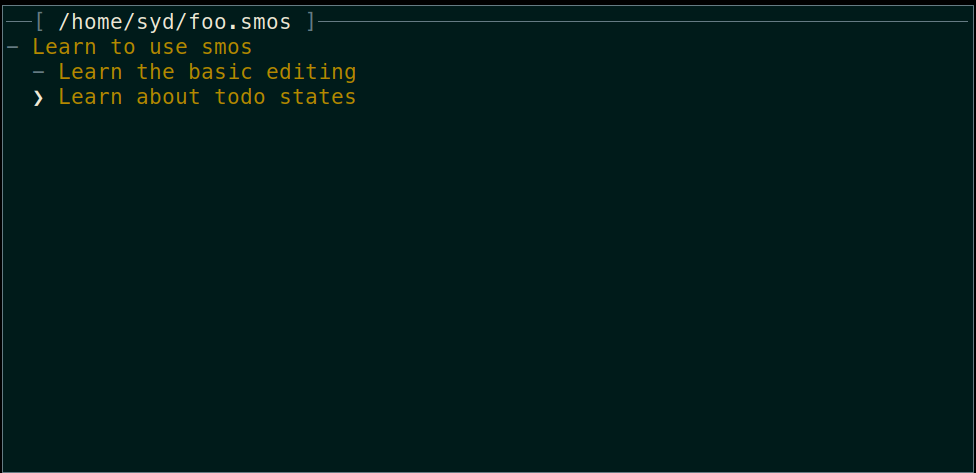
This will be your first project.
Move it to ~/workflow/projects/smos.smos. This will be important for the reports later.
The last piece of the puzzle for these first steps is the TODO state. Every entry can also have a TODO state. You can change the TODO state using the entrySetTodoState_TODO and related actions.
Mark all the entries as TODO and then mark the first as NEXT. Then you can mark the first as DONE and the second as NEXT. That should look like the following:
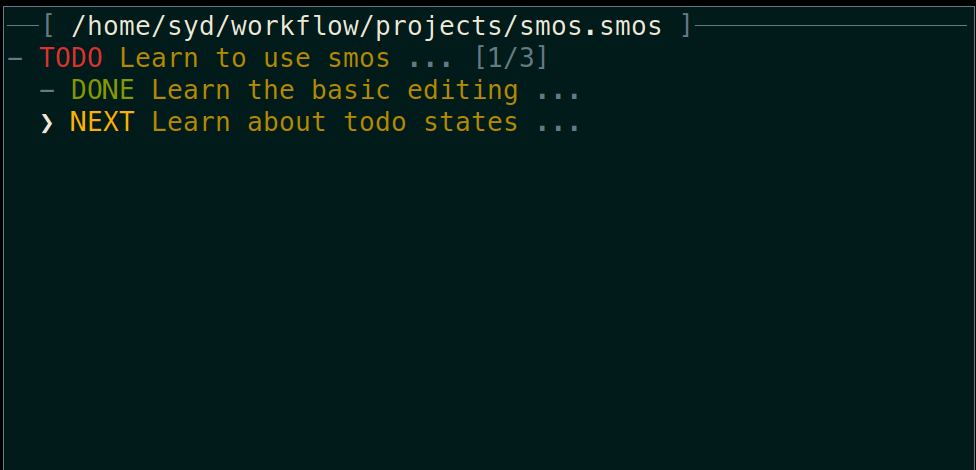
The TODO state means "I have committed to doing this". The NEXT state means "This is the next action that I can take to move this project forward". Usually you have only one next action for a project.
Projects and the next action report
When you follow the flowchart in the previous blogpost for clarifying and organising, you want to create a new file in ~/workflow/projects (the projects directory) for each project.
When you have done that you can start using the smos-query tool to run the next action report. Run the next action report using smos-query next. You should see something like the following:

The smos-query tool will look at all the files in your ~/workflow directory and list all entries with the NEXT state.
You use this report to figure out what to work on next. You look at the items on the list and choose the one that your gut feeling tells you is the right thing to work on right now.
Self-management for beginners
Self-management using Smos is a big topic, but you now have the tools to get started. You can start by using these two rules, until your learn more in the next few posts.
Every piece of input in your life must be captured, either in a physical inbox or in Intray.
You are only allowed to work on something if you find it in your next-action report.
References
For more information about Smos, see the documentation site. See also Intray and the related blogposts.